Carrying out a load
forecast
Once all settings and checks have been completed, click on
the green arrow  to start forecasting
the load forecast. If this is the first time a load forecast has been run with
the new settings, a data check will be carried out and a window will appear
showing the last date for imported values. You can then see any data control
warnings.
to start forecasting
the load forecast. If this is the first time a load forecast has been run with
the new settings, a data check will be carried out and a window will appear
showing the last date for imported values. You can then see any data control
warnings.
If you then click to confirm that you want to carry out the
load forecast, the forecasting process will begin. In the bottom left-hand
corner, a progress bar shows the progress of the forecasting process.

If a forecast has resulted in a warning or an error,
a small box will appear after all forecasts have been produced showing how many
series succeeded and/or failed, together with forecast warnings.
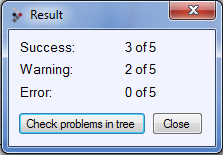
If you want to mark the series containing warnings and
errors in the tree structure, click on “Check problems in tree” and then click
on “Close”.
If you want to carry out a load forecast without marking
series with warnings, just click on “Close”.
The diagram and data grid will then be filled with forecast
data which you can check and edit.